


Step 1
Hook the caribiner clip to the lane line hardware.
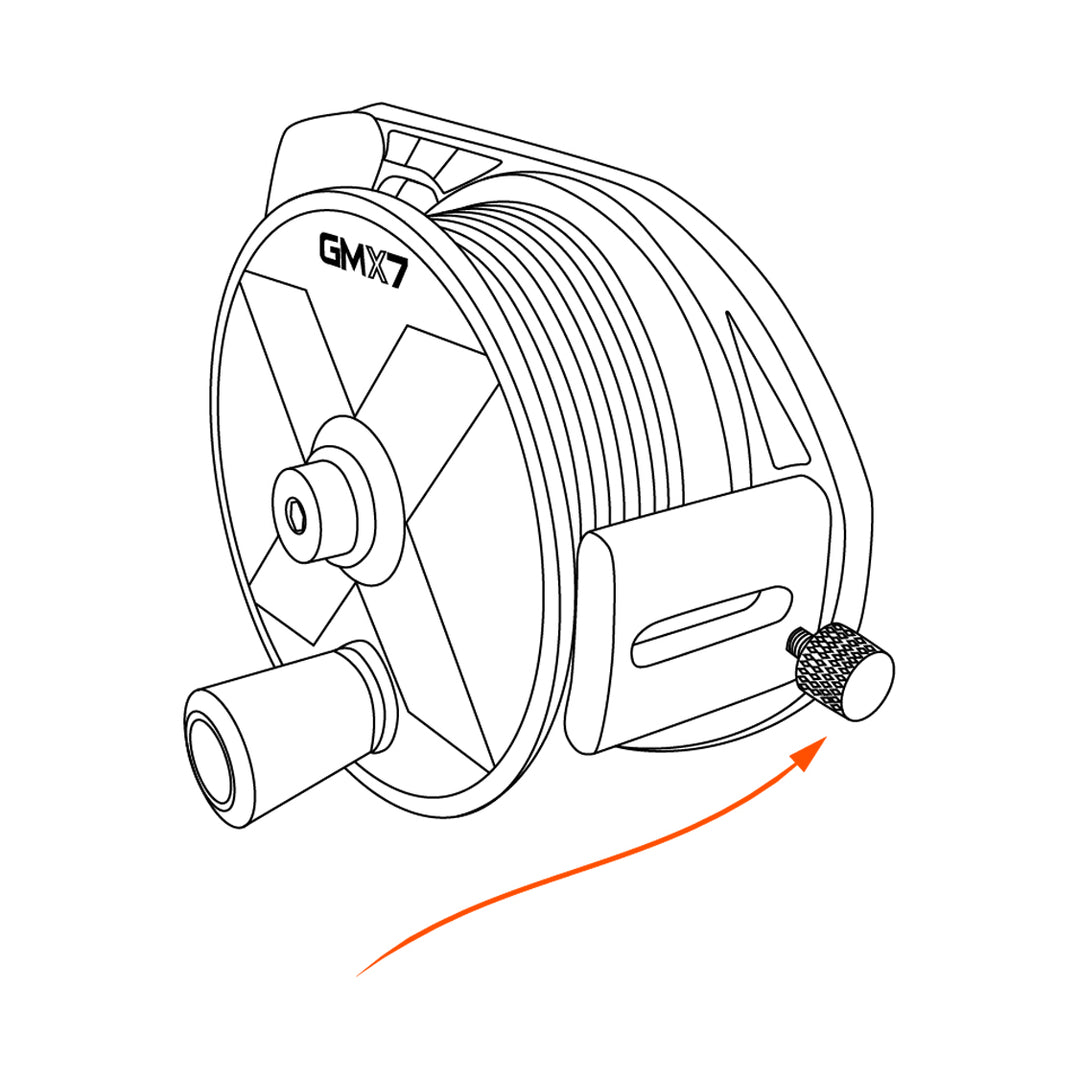
Step 2
Unscrew the reel fastener, then swim or walk to the opposite end of the pool while holding the reel, letting it unwind.
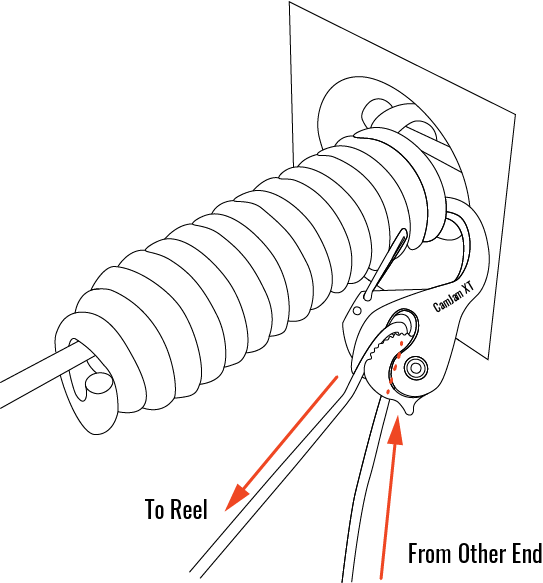
Step 3
The camjam carabiner will secure the line at the opposite end of the pool. Follow the diagram to lock the line in place.
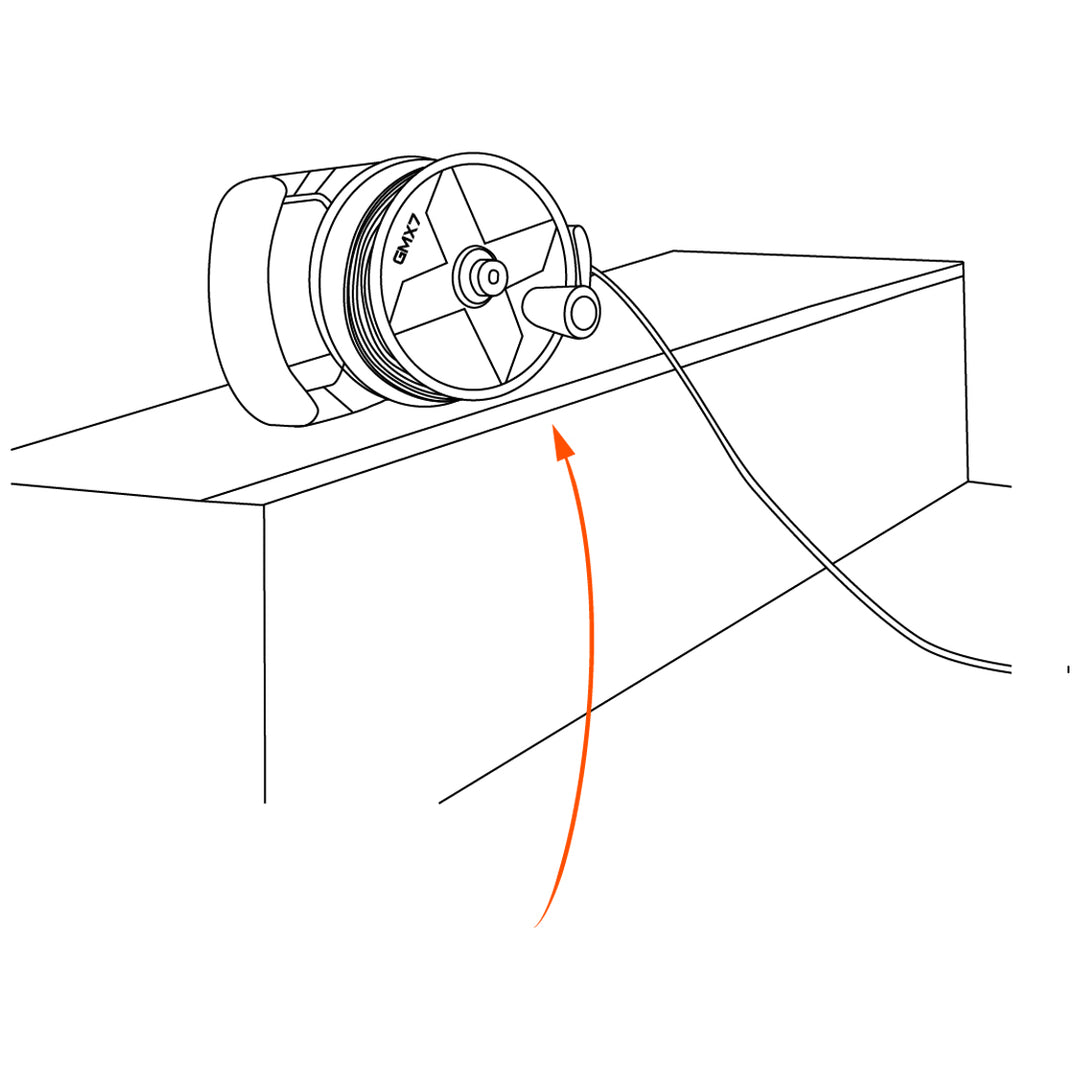
Step 4
Once the camjam is in place, the reel can go on the pool deck, out of the way.
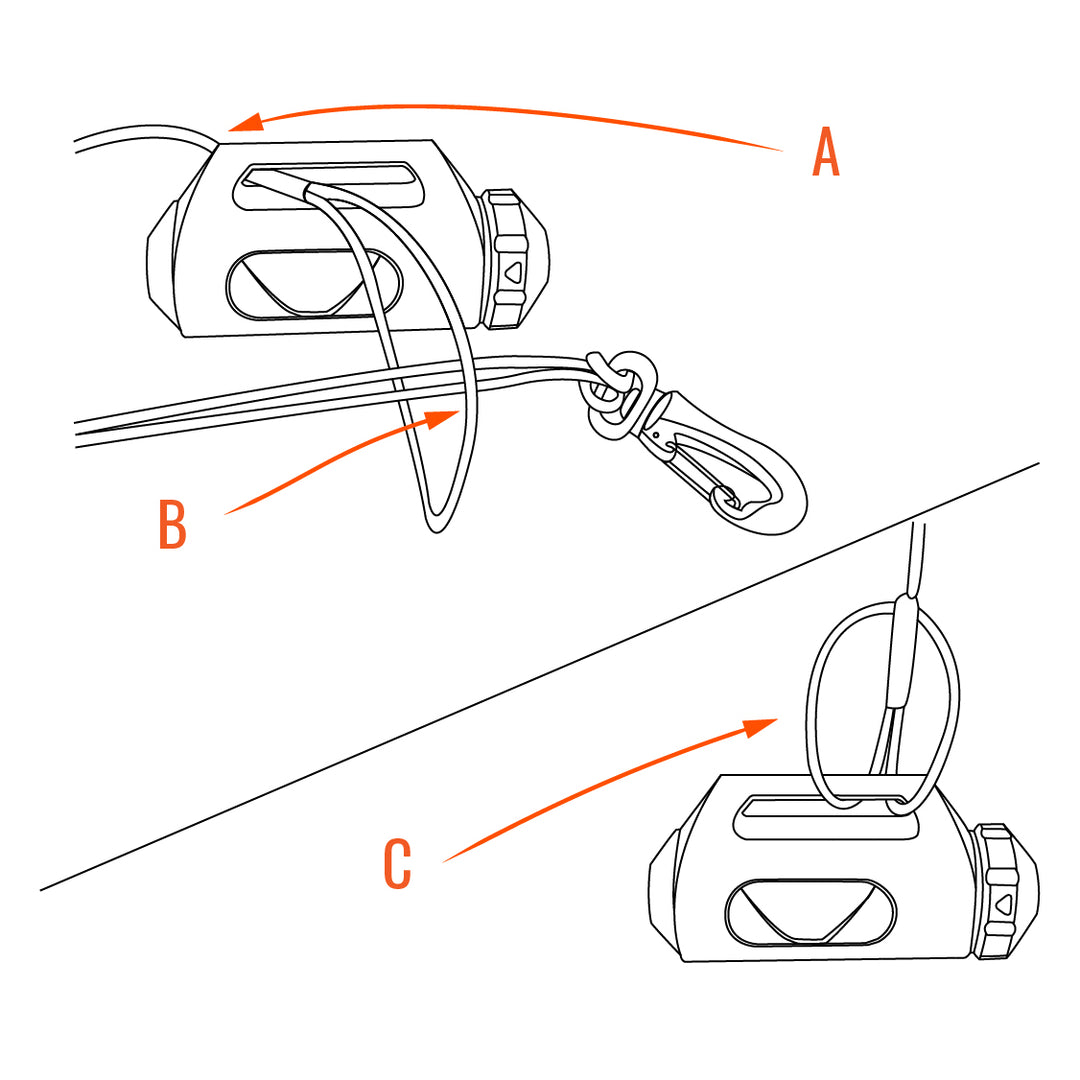
Step 5
Connect the leash to the shuttle handle.
A: Loop under handle
B. Slide clip through loop
C: Pull all the way tight
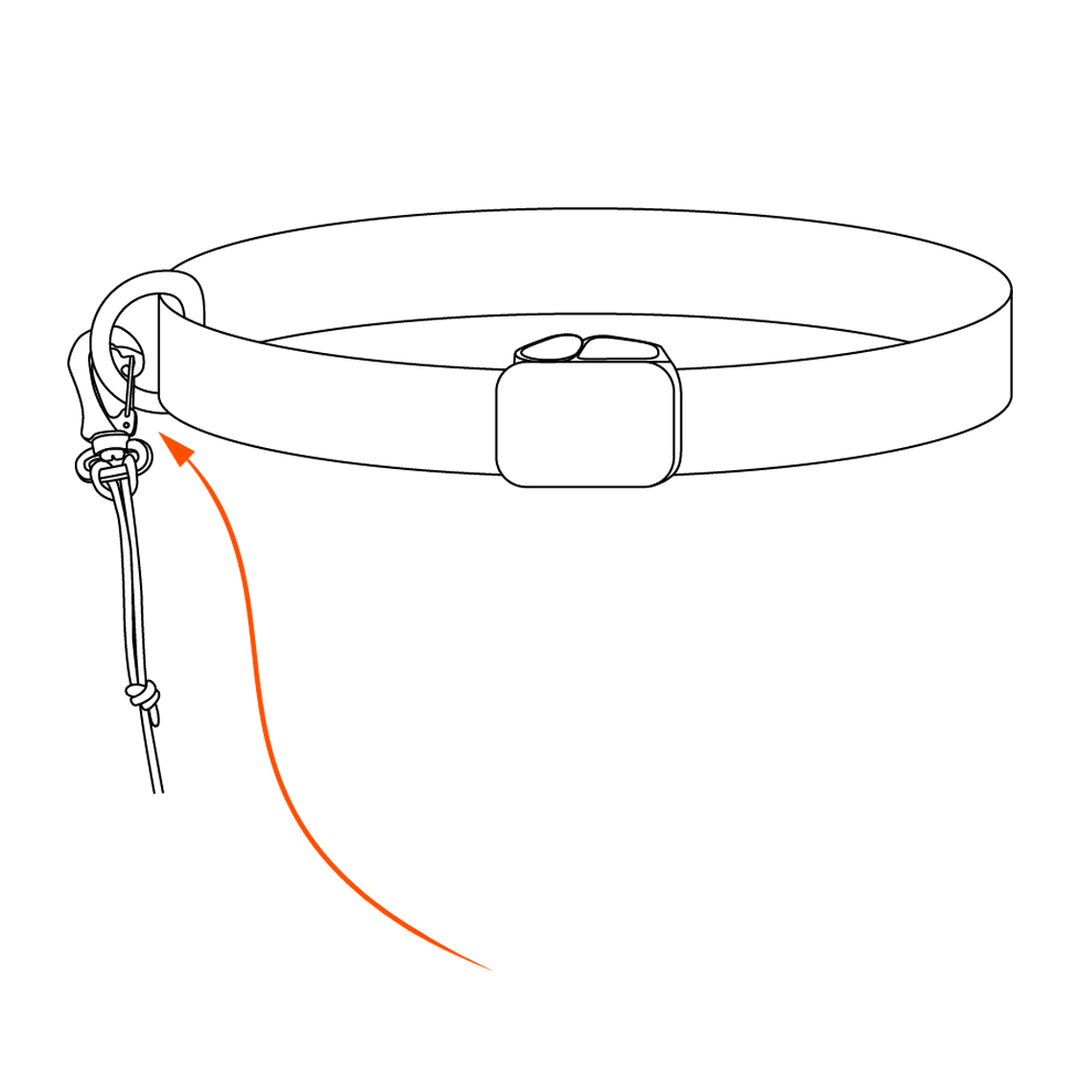
Step 6
The leash swivel clip connects to the d-ring on the belt.
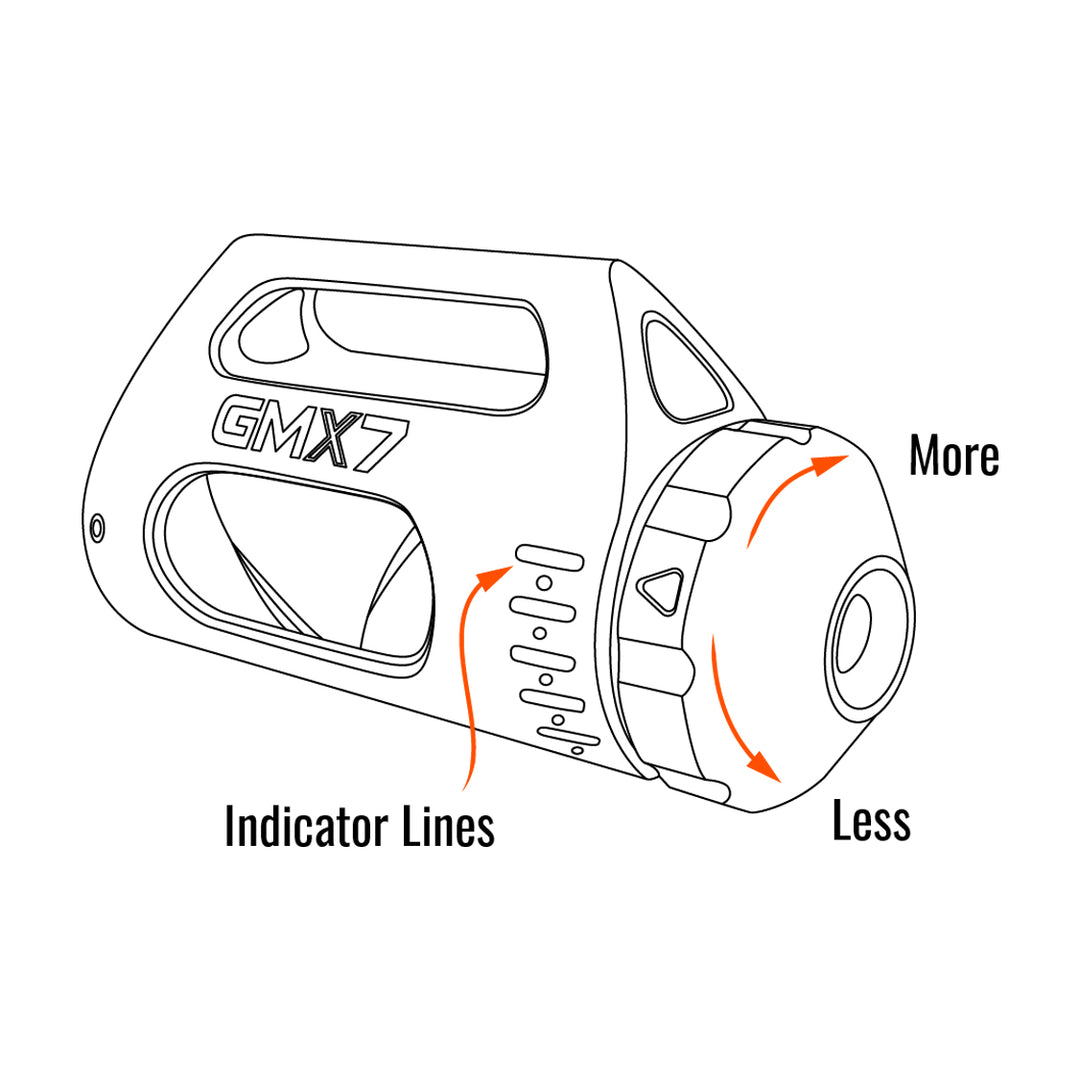
Step 7
Adjust tension by turning the screw top of the shuttle. (Clockwise for more resistance, counter-clockwise for less.)